Training Pants (tutorial)
When I started potty training my nearly 2 year old, I went in search of training panties. I had been using cloth diapers before hand, and had tried using those for starters but they didn't work too well for potty training. I'd heard of the plastic covers and such, or trainers that had a layer of PUL in them. But I really didn't want those; I was in search of the old fashioned kind, like the Gerber ones that were made from white cloth and didn't have a plastic lining. Turns out, they're no longer just in white, but come in various prints and can be found at Walmart. That's where I found the ones I bought. They ran about $9.00 for 3 pair. My first thought was that I could make them rather than buy them. I searched for a pattern and tutorial online. I found both, but in separate locations. The first thing I saw was this tutorial over at Lemonwood Clock. Then I followed the link in her tutorial to another post by the The Mom Road where I found a printable pattern. I assembled a pair of panties from the pattern and followed the directions given by the Lemonwood Clock. I found that the panties turned out too snug for my kiddo. There was no way my daughter would ever be able to take them on and off herself if they were a struggle for me. So I re-drew some of the pattern, making it wider at the side panels. I also decided to make the leg bands and waist band differently than shown in the Lemonwood Clock post. I'm making this tutorial based on the pattern from The Mom Road, and I will show how I made them differently than what was done over at the Lemonwood Clock. The way I went about it probably took longer and was more work, so not everyone will want to follow what I did. Why did I make them as I did? It probably has something to do with being a perfectionist :-P I will also upload the drawing I drafted a bit, you will find it at the bottom of the tutorial photos. Sit back and enjoy all the pictures :-)
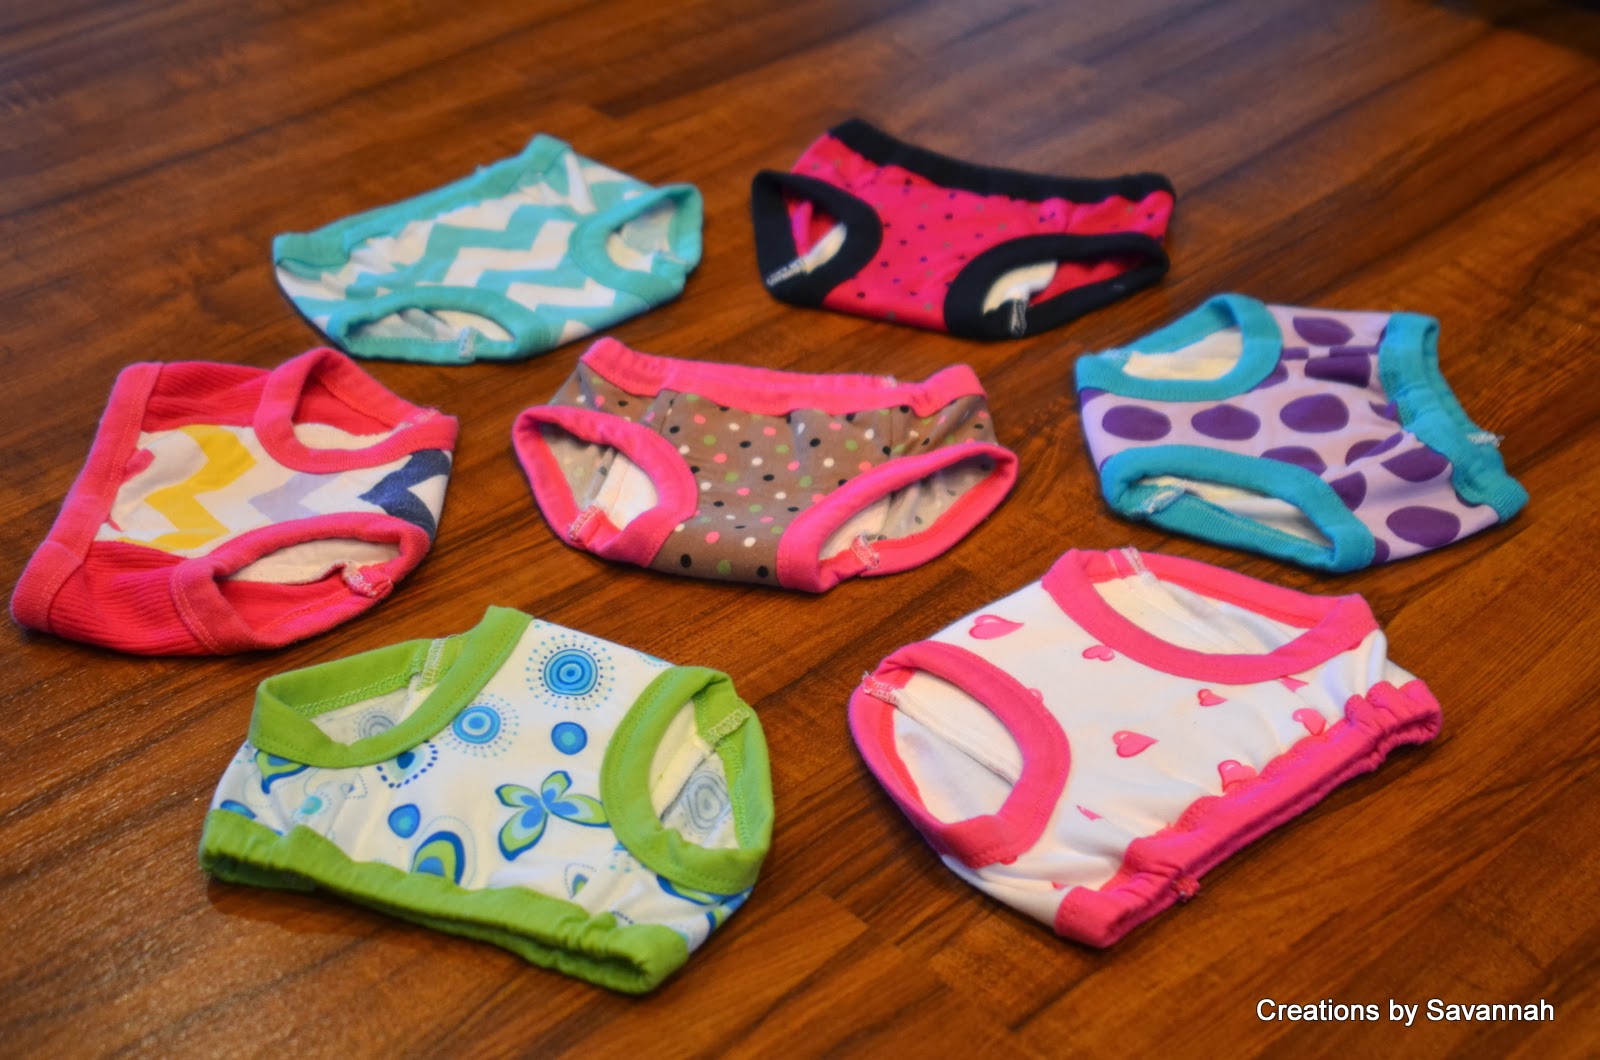


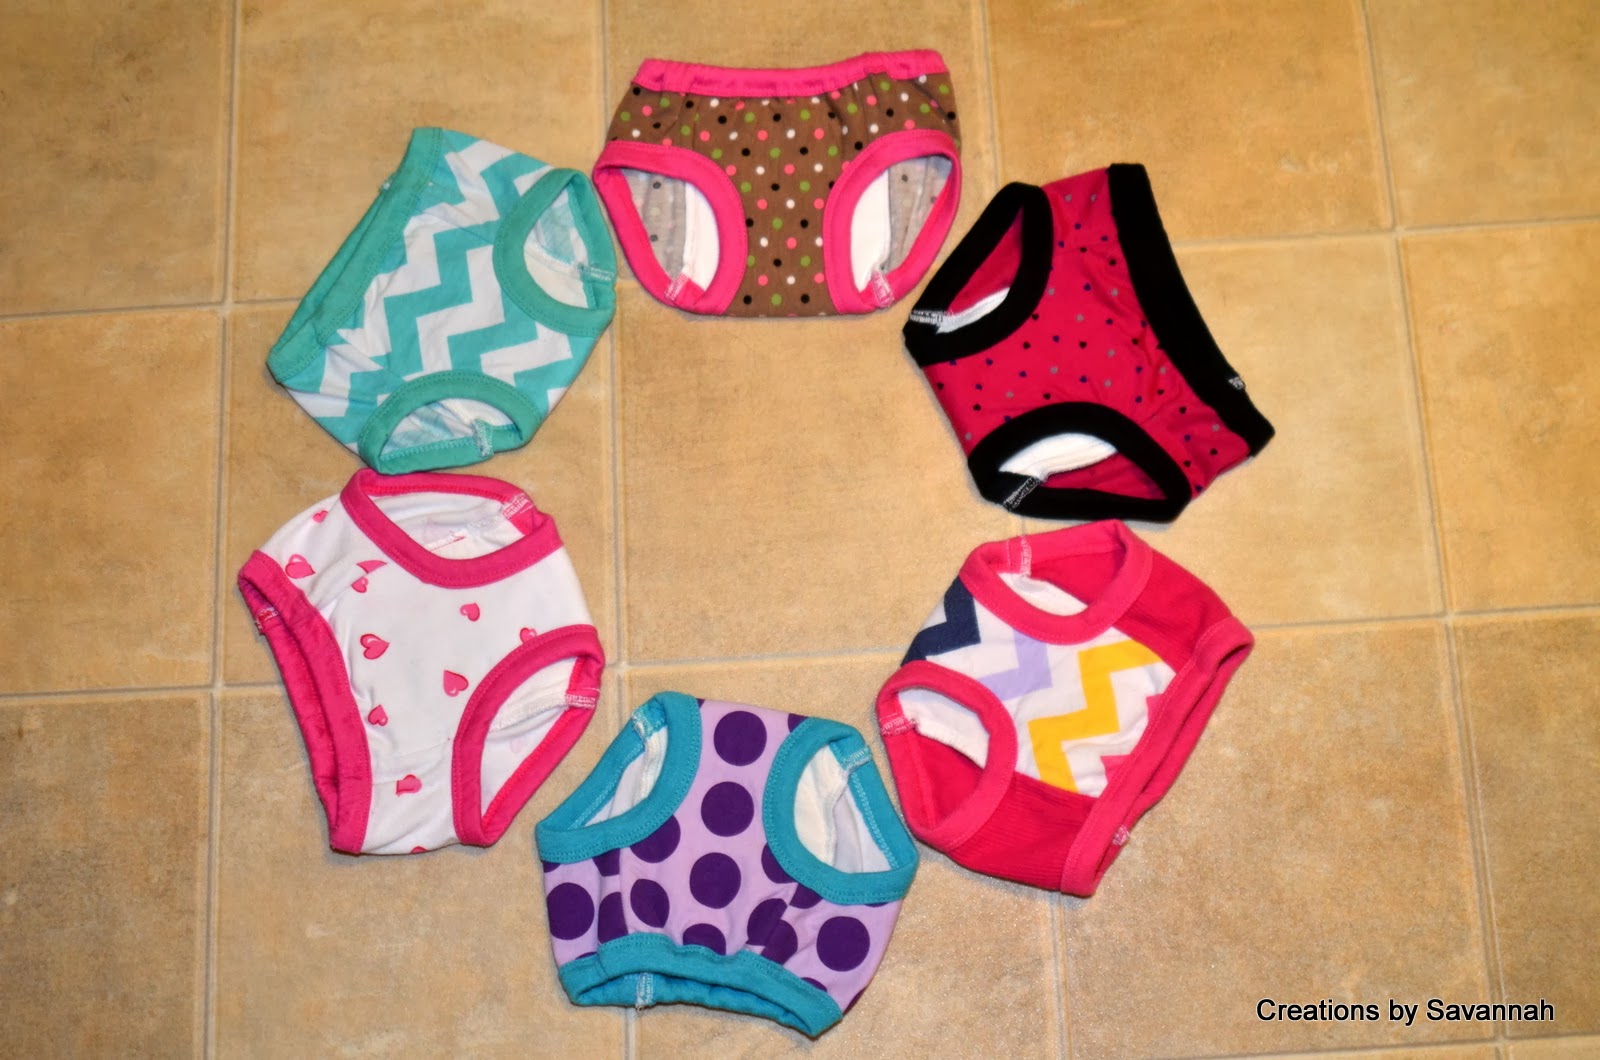
 First batch done. Couldn't do too many at once, it was too overwhelming!
 A few more done, at a later date...


It was fun, I loved it...and at times I also hated it :-P It was a lot of work. In order to make any progress at all, I had to have all three machines out. Sewing machine, serger, and cover stitch machine. Good luck to anyone who tries for training panties, and maybe they'll be smarter than me and find an easier way to do it! :-)
Here's a pretty picture of the finished result.
This picture shows how I used an old white t-shirt for the inside lining. Really, you could use any old t-shirt for the inside fabric, as well as the outside. I recently started looking at knits in a whole new way. Seeing possibilities in old clothing is fun, and less expensive than going the route of buying designer knit yardage. I bought my prints as scrap pieces from a fabric swap. Because they were cute and such, but I could have done it a lot cheaper if I'd just gone with some t-shirts I already had.
Here are the photos I decided to go with for the tutorial. The example on the right shows the absorbent layer, which is fleece. I cut it out the same size as the outer fabric and lining at first, and then cut about 1.5" away. Making it shorter, so that it won't get sewn into the waistband. One less layer to have to go through. Notice how I don't sew all the major seams together before putting the leg bands on. This is one place where the assembly of the panties varies from the tutorial given by Lemonwood Clock. In that tutorial all the major seams get sewn together, and then they add the leg bands, and waistband.
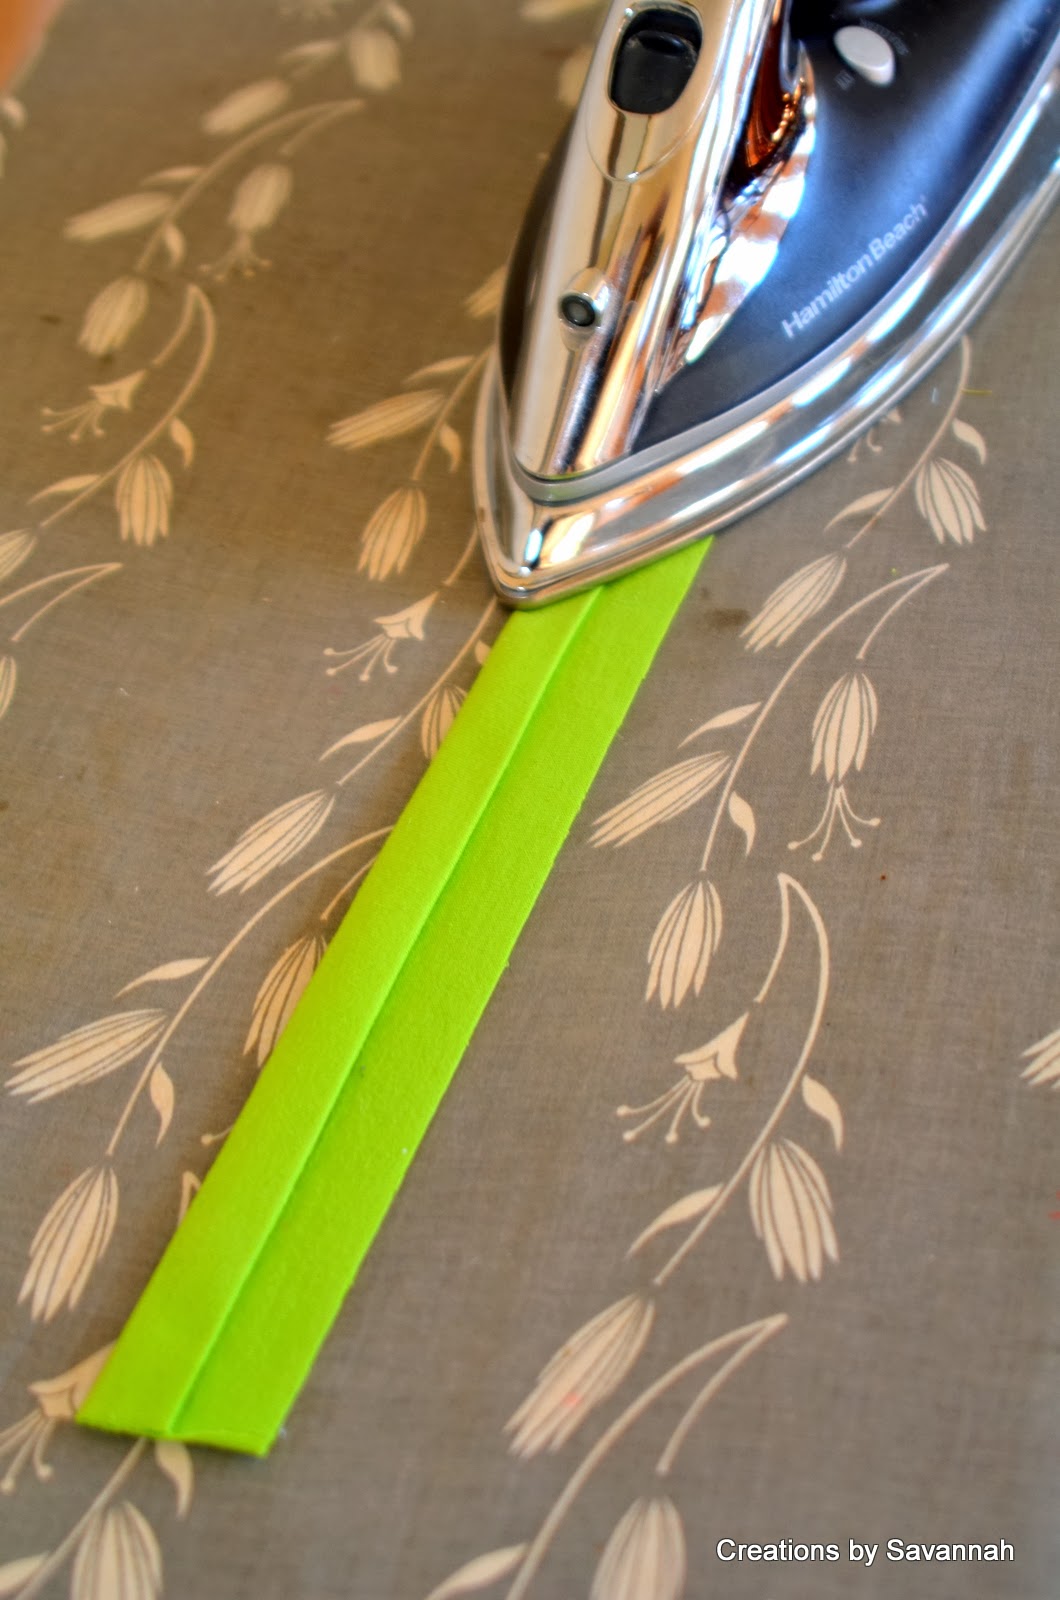
I didn't put a leg band or waistband drawing on the redrawn pattern. For the leg and waistbands I cut these green strips from an old t shirt, which would match my print perfectly. Cut the strips, 2.5"x16" for the leg bands, and 2.5"x24" for the waistbands. Fold 3/8" over and press....
Then fold over again about 5/8" and press. You will have a strip of fabric still hanging out there. Leave it be, it will get cut off later, after you've sewn it to the panties.
For attaching the leg bands I used the cover stitch machine. See how the left over extension of fabric is to the backside of the panties. This is sewing the leg bands to the panties before closing up the rear/side seams. Opposite from how Lemonwood Clock first sews all the major seams together, makes the leg bands a circle by sewing the ends together. The leg bands being a smaller size than the leg opening, so you can pin it evenly around and stretch it while its being sewn to the leg opening...possibly using a serger to do the sewing. Now, I did try that..but I'd changed the size/cut of the leg openings and I was having a bit of a difficulty figuring out just how much smaller the leg bands needed to be than my opening. I ended up with some leg bands being too loose and looking terrible. I probably could have kept trying and figured out the perfect size band for the leg opening..but I didn't want to :-P
Another shot of the leg bands being attached to the panties. Now just because I did this with the cover stitch machine, does not mean that you have to use a cover stitch machine. Most people don't have one. I only have one because of my generous Grandparents...
(who thought they were buying a serger at an auction and gave it to my mom... I saw that it wasn't a serger, but a cover stitch machine and said, that's not a serger. Mom, and both Grandparent's looked at me like I was crazy, and told me that it was a serger. I was like, uh, no its not...there's no knife, its a cover stitch machine! I was so excited because I'd wanted one for a while... a week or so later, mom gave it to me because she didn't want to take the time to figure out how to use it. Anyway, I was thrilled!)
Back to my point... you don't necessarily need a cover stitch machine to do this. Some sewing machines come with a double needle feature, and even if they don't, you could use some other stretch stitch for this.
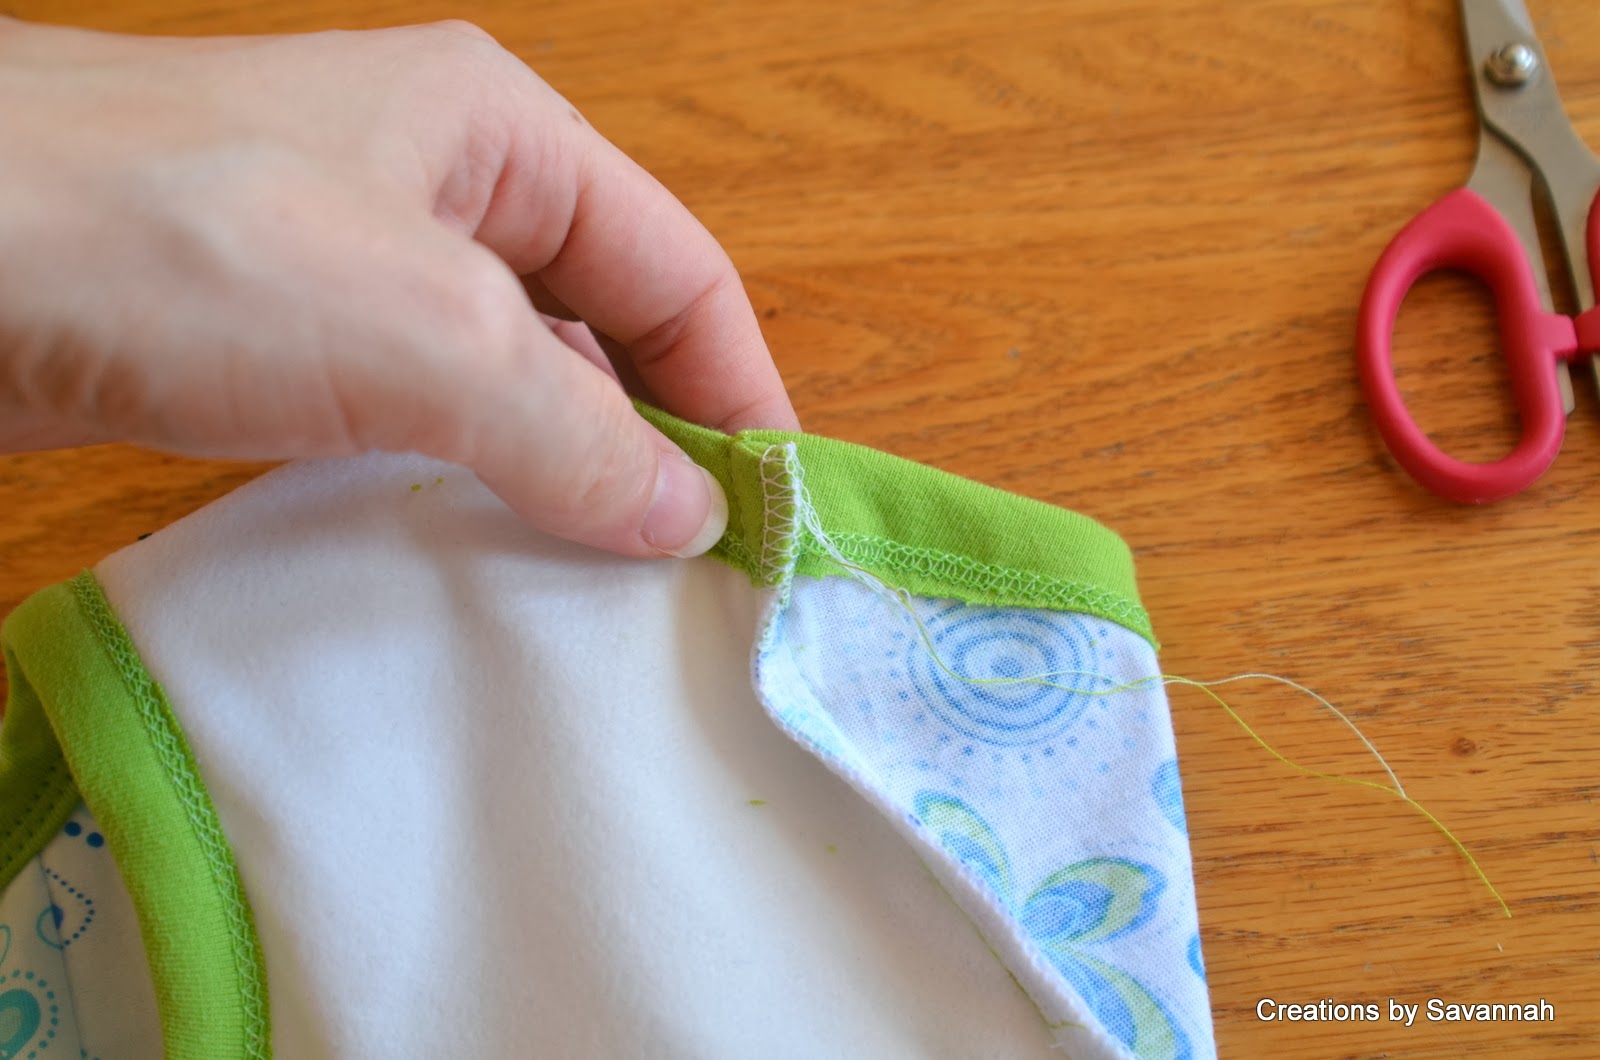
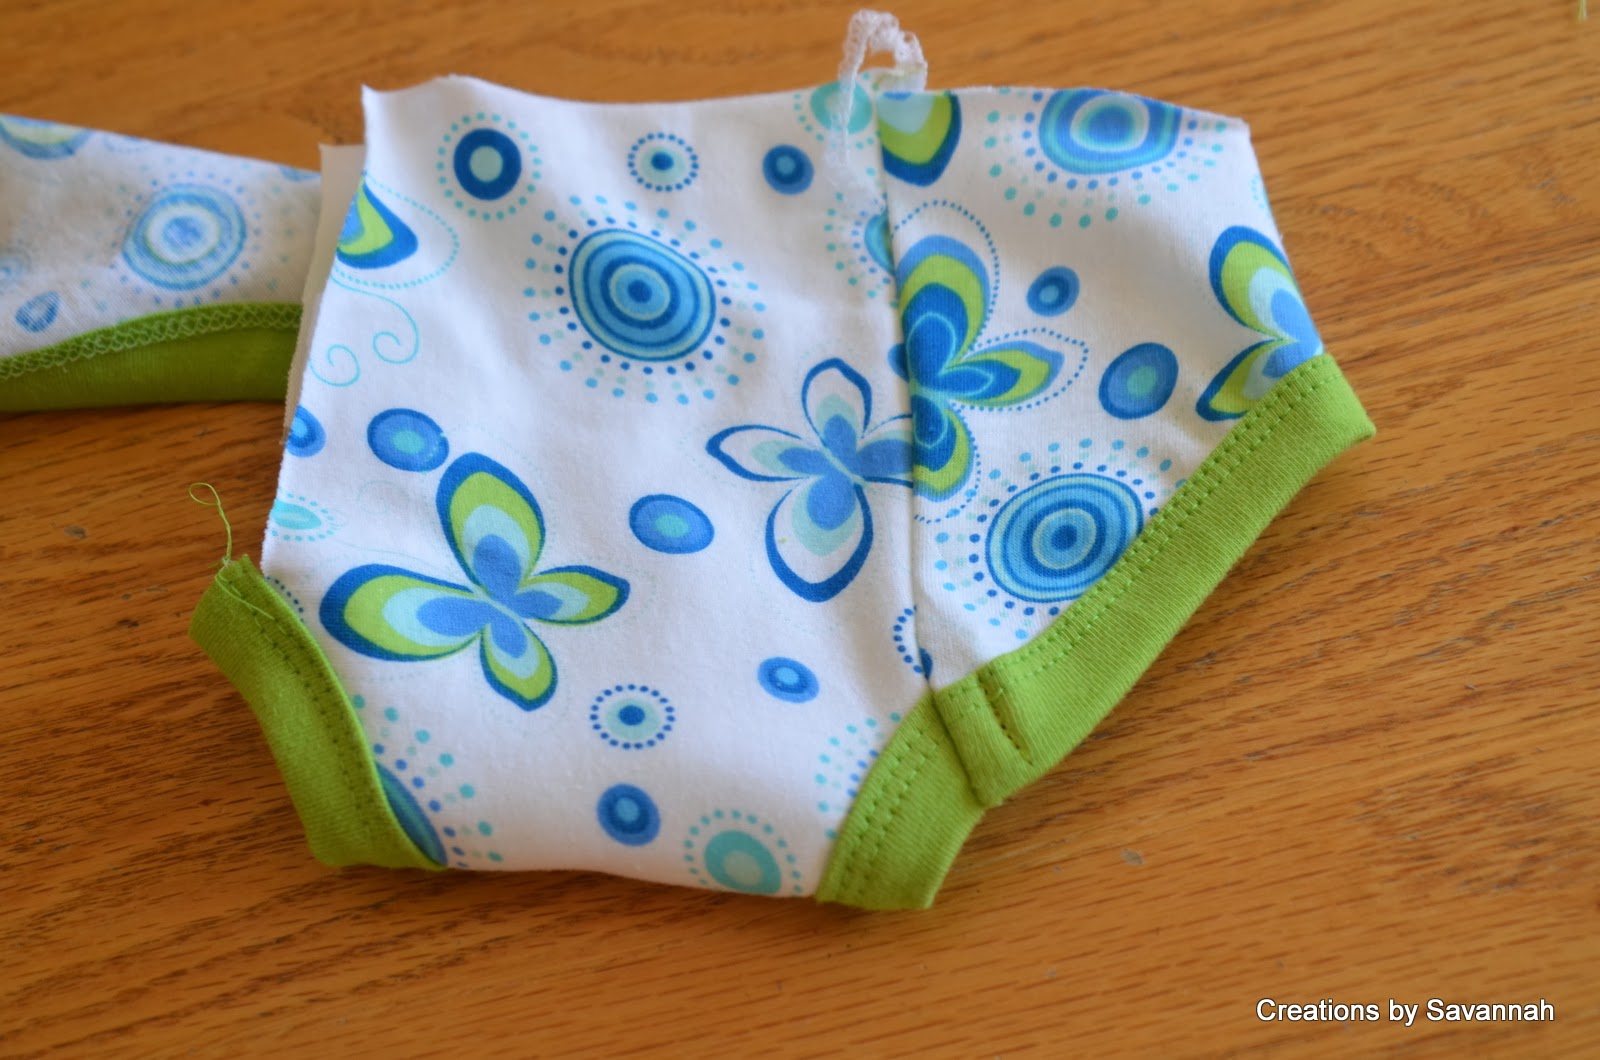
Leg bands attached; this view is from the inside of the panties. The band on the left side of the photo is not yet trimmed.
Stitching detail
Now to close one side of the panties.... You can start with either side. I always start on the right side, and use the sewing machine to start with so that if everything doesn't line up perfectly, and I have to rip it out, at least I don't have to tear out serger stitches.
Showing the inside of the seam shown in the previous picture.
And then showing it after its been serged.
I do not cut my threads off immediately, I use them to pull to the inside in an effort to make sure my seam allowance doesn't show on the outside of the panties.
Sewing the seam allowance down at the leg binding.
Leg binding sewn in place.
The outside of the panties after the seam allowance has been sewn down at the leg band.
A closer picture of the seam allowance being sewn down at the leg band.
Onto the waistband. It should be cut at 2.5"x24". You won't need all of the length, the excess gets cut off when you sew your final rear/side seam together. My bands in this instance were not as long as I suggest. They were actually a bit short and I had some stretching to do, which I didn't particularly care for.
Showing the waistband being wrapped around the top part of the panties and about to be sewn on.
Waistband on, and ready for elastic. I actually did not see the other tutorials have elastic, but this is how I did mine. A safety pin is the best way I know of to run elastic through a waistband.
Showing the elastic in and secured at both ends of the waist casing.
A closer photo.
Here's the last rear/side seam, sewn with the sewing machine first, then I'd go on to serge it. Though, if you don't have a serger, you can simply sew, trim and zigzag the edge to finish.
Shown with the serged finish on that last rear/side seam.
I did not cut the extra threads, I pulled them to the back side of the fabric, making sure that my seam allowance would be hidden from the outside of the panties.
Showing from the outside, the seam allowance being sewn down at the waistband.
The finished panties :-) Tada! In my opinion, these were more work than they were worth...but still, I wanted to make them, and have them turn out exactly how I wanted.
~~~~~~MODIFIED PATTERN BELOW~~~~~
Here are 2 links to the 2 pages the pattern will print out on. Page 1 (I am so sorry, the silly thing is loaded in there 3 times! I will fix as soon as I can.) And Page 2. And like I said, I didn't draw the leg band, or waistbands on the pattern. I just gave measurements for them. Leg bands are to be cut at 2.5"x16" and waistbands are to be cut at 2.5"x24". Again, it wasn't my pattern to begin with and I'm not taking credit for it. I'm glad to have found it and to have had the opportunity to use it, and thankful to have the skills to modify it to fit my needs.
~*~
Here are a couple pictures of my tot wearing her trainers...
And more pictures...I love pictures! :-)
It was fun, I loved it...and at times I also hated it :-P It was a lot of work. In order to make any progress at all, I had to have all three machines out. Sewing machine, serger, and cover stitch machine. Good luck to anyone who tries for training panties, and maybe they'll be smarter than me and find an easier way to do it! :-)
Nice job. Pretty pictures! I enjoyed reading and learning. Thanks for the tutorial and tips. I don't know whether you've talked me into it or out of it, lol I hope to try sewing up some for my grand daughters soon!
ReplyDeleteWell, lets just put it this way. I viewed it as something I wanted to do, but for me it wouldn't be worth making them to sell. Just not worth the time. You can do it for you, but unless you just love it, you probably won't want to do any more lol!
DeleteI hear you on the time thing--some projects are really only worth it if you enjoy it or really want the end result.
ReplyDeleteThey came out so cute though! And I'm a bit envious of the cover stitch machine! :-)
Hey, do I need to add 1cm around the pattern before cutting the fabric? Thanks!
ReplyDeleteHi! No, they are good as is.
DeleteIs the outer fabric cotton ???? and then you use fleece ???
ReplyDelete